Get started with CloneRadar
Five steps from sign-up to your first flagged session — one script tag, no code changes to the rest of your app.
- 1
Create a project, get a tracking key
Sign up and create a project for each site or app you want to monitor. CloneRadar gives it a unique public tracking key — safe to embed in client-side code, since it only identifies which project events belong to.
- 2
Add one script tag to your site
Paste it in your site's <head>, alongside your other analytics tags — CloneRadar runs next to whatever you already have, not instead of it. Autocapture starts immediately: navigation, clicks, and viewport changes are tracked with no further setup.
<script
  async
  src="https://getcloneradar.com/radar-v1.js"
  data-project-key="YOUR_PROJECT_KEY"
></script>
- 3
Optionally tag trial accounts
Call radar.init() once you know who's logged in, passing the account's ID and when it was created. That unlocks age-based signals — like weighting exploration that happens in a brand-new trial's first 24 hours more heavily. Everything from step 2 already works without it.
radar.init({ accountId: "trial-user-42", accountType: "trial", createdAt: "2026-01-01T00:00:00Z", }); - 4
Risk scoring happens automatically
Every session is scored as events come in, against a fixed set of signals — no configuration required. CloneRadar looks for unusually broad feature coverage in a single session, bursts of activity faster than a human evaluating a product, and clusters of visits to sensitive areas like pricing, API endpoints, and recommendation logic. Signals combine into a single 0–100 risk score.
- 5
Review, whitelist, export, get alerted
Flagged sessions land in the Threats dashboard, ranked by risk score. Mark known-good accounts — your own QA or internal testers — as whitelisted so they're skipped entirely. Export a PDF evidence report for any session you need to escalate. Optionally wire up a Slack or Discord webhook to get pinged the moment a session crosses into high risk.
Active Defense
ScaleDetection alone doesn't stop a clone attempt in progress. Knowing about it isn't the same as doing something about it.
The moment a session crosses your risk threshold, CloneRadar sends a signed webhook straight to your backend — so your own system can isolate, rate-limit, or flag the account automatically, before the clone attempt is finished.
No one has to be watching a dashboard. Your system responds in real time, on your own terms — CloneRadar detects, you decide what happens next.
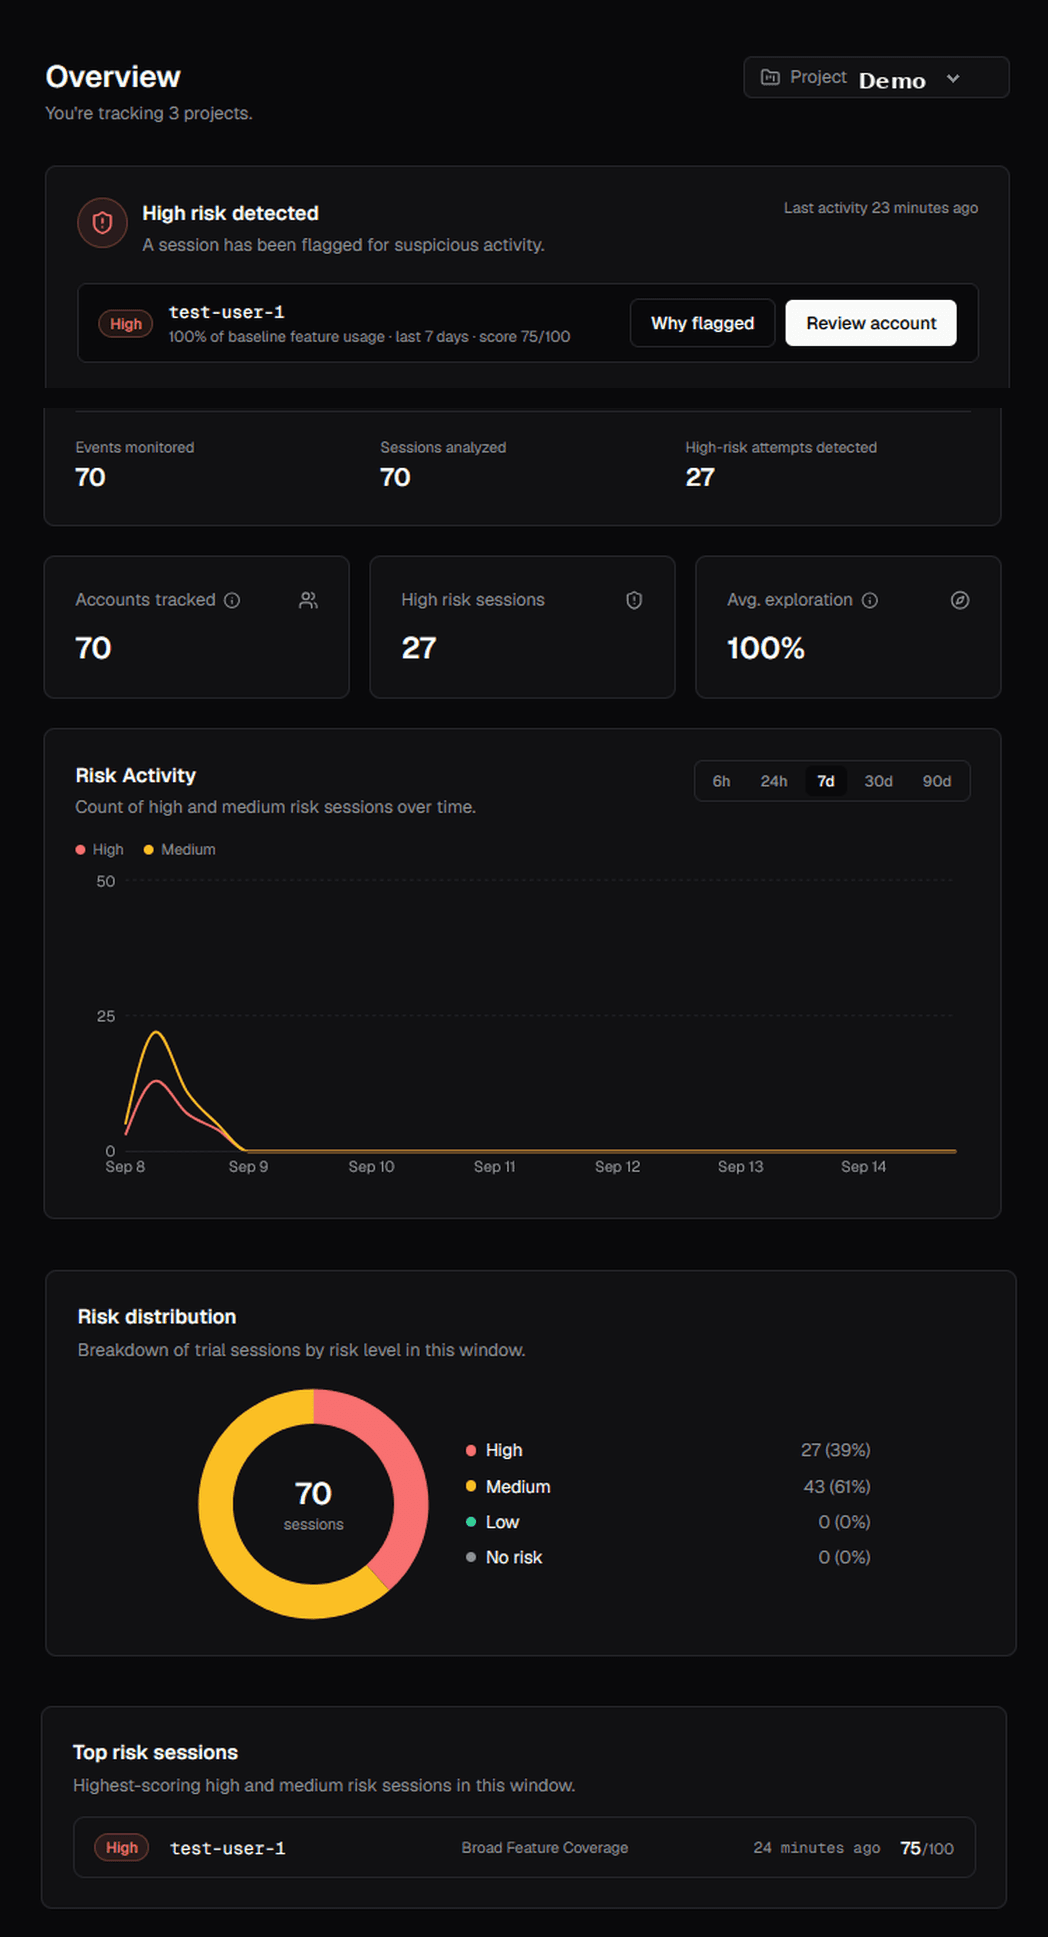
See the pattern as it happens
CloneRadar tracks high and medium risk sessions over time, so you can spot spikes and drill into the sessions that matter most.
PDF evidence report
Every flagged session exports as a timestamped PDF — score, signals, and full event timeline, ready to share with your team.
Webhook alert
High-risk sessions fire a signed webhook to your own backend the moment they're detected — no dashboard-watching required.
Example data shown for illustration.